

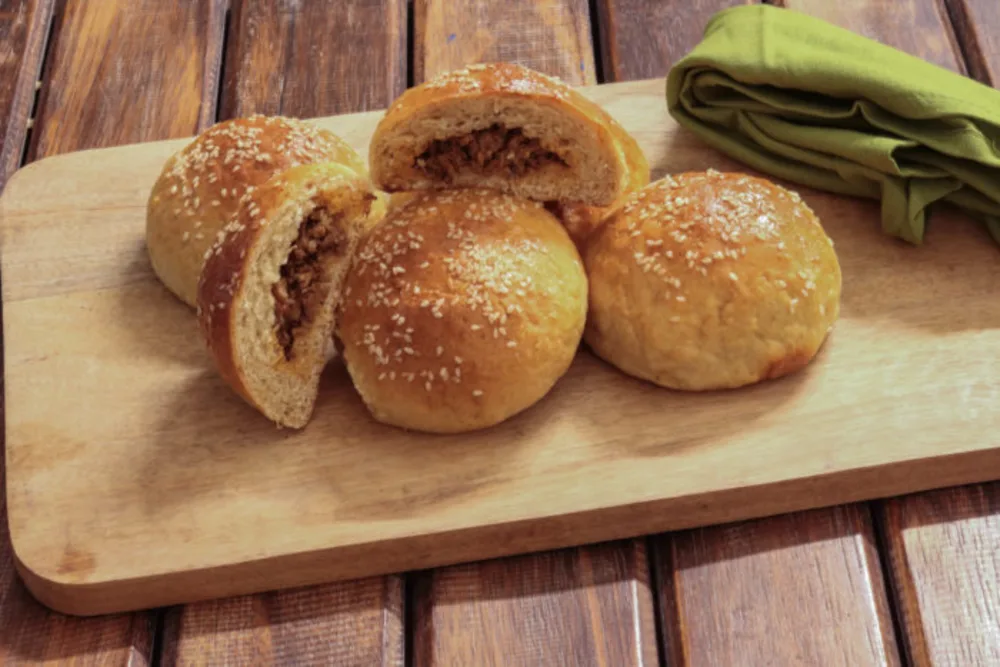
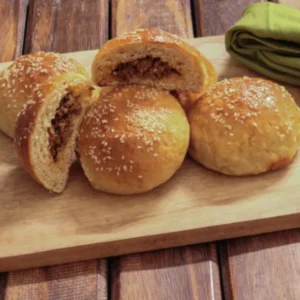
If you’re seeking a stuffed buns recipe that’s delicious and healthy, you’ve come to the right place. This post is all about a beautiful, domed, whole-wheat bun with juicy, spiced mutton(goat) keema (mince) centre. The bun itself is golden-crusted, and soft with the mild sweetness of whole wheat flour.
Bread flour vs regular whole wheat flour
In my stuffed buns recipe, I chose to use whole wheat bread flour in combination with whole wheat flour(atta) since bread flour has a higher percentage of protein (13%), to give the buns structure. Using only regular whole wheat flour or atta may yield denser buns with a tighter crumb. Whole wheat bread flour is easily available everywhere. You could sub one of the flours for all-purpose flour or maida if you choose. The amount of liquid in the recipe will have to be reduced accordingly.
Handling the dough
The dough in my stuffed buns recipe is slightly tacky and sticky in the beginning. But don’t let that deter you from making them. Be patient and handle the dough with a little patience and light hand and you will be able to knead and shape them with no trouble. I promise that you will be grateful for the hydration when you bite into them. These keema stuffed delights will be soft, with tiny air holes that make every bite into its pillowy crumb, an absolute pleasure. Use spare dustings of dry flour while kneading, so you don’t add too much extra flour. A pastry scraper is great, if you have one, to pick up the dough.

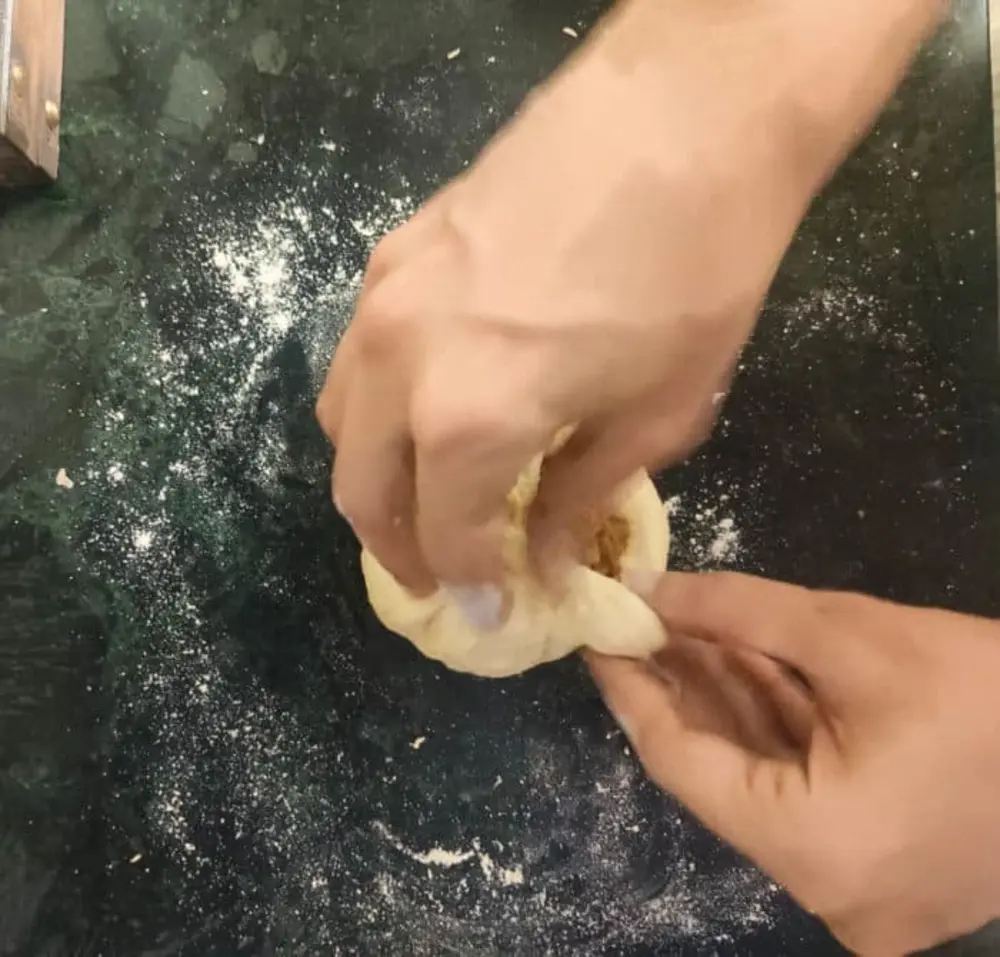
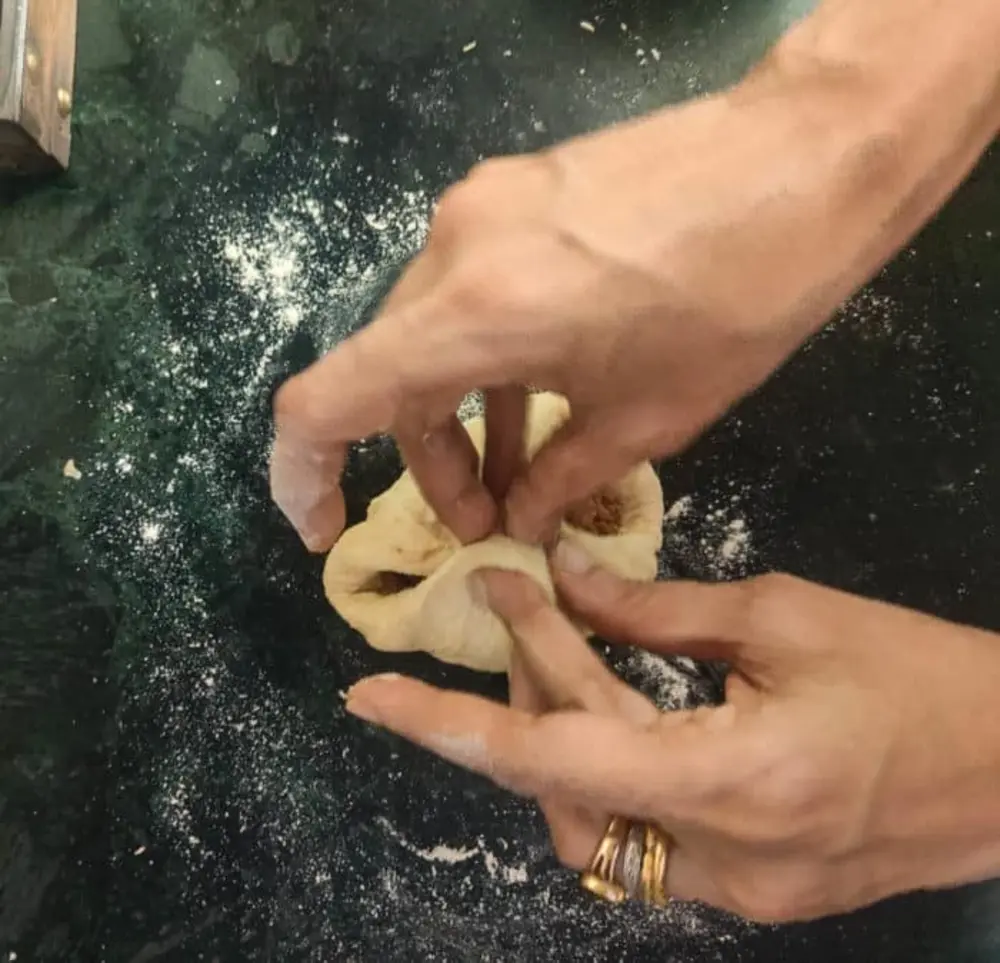
This video https://www.youtube.com/watch?v=xUZlFXvTDWI shows you the easy way to fill and shape the buns. Trust me, it’s not difficult. I found it enjoyable, even meditative in a way. This stuffed buns recipe is worth your effort because these domed beauties are meals in themselves and will save you a bunch of work later. You can pack them in lunchboxes, pair them with a quick salad or fresh juice or just eat them on the go. My shaping skills are far from perfect but baking bread and putting in the effort to make these spherical beauties has been all about the satisfaction I get from the process. So try it.

Keema Stuffed Whole Wheat Buns
Ingredients
For the buns
- 240 g whole wheat bread flour
- 180 g whole wheat flour (atta)
- 281 g lukewarm milk (barely warm on the wrist)
- 2 tsp instant dry yeast
- 1 tbsp sugar
- 1 tbsp salt
- 45 g butter melted
- 1 egg for the egg wash
- White sesame seeds
For the mutton mince filling
- 400 g mutton(goat) meat, minced
- 2 medium onions, finely chopped
- 3 fat cloves of garlic
- 2 tbsp tomato paste
- 2 tbsp Worcestershire sauce
- 1 tsp dried thyme
- ½ tsp dried rosemary
- ½ tsp chilli powder or chilli flakes
- ½ tsp coriander powder
- ½ tsp ground cinnamon
- 1½ tbsp olive oil
- ½ tsp freshly ground black pepper
- Water or chicken stock as needed
- salt
Instructions
- To make the buns, dissolve the yeast and sugar, in 1 tbsp lukewarm water, cover and leave to froth and rise for 10 mins.
- In a large bowl, whisk the flours with the salt. Then add the lukewarm milk, melted butter and yeast mixture and knead in a stand mixer or with a hand blender using the dough hooks on medium speed. You can use your hands but the dough will be a little sticky and tacky in the beginning so a mixer is preferable.
- Knead the dough for 7-10 minutes till the dough becomes elastic and smooth. lightly flour your counter and tip the dough onto it. Shape into a ball and place in an oiled bowl, seam side down, making sure to lightly oil the surface of the dough ball as well. Cover the bowl with cling wrap and leave to rise in a warm place for 60-90 minutes till the dough has doubled in volume. You may need to let it rise for longer in cold weather.
- Meanwhile, cook the filling. Heat olive oil in a pan on medium heat and cook the onions till soft. Add the garlic and dried herbs and saute for 20 seconds more. Tip in the minced meat and sear, breaking up the lumps with the spatula or spoon.
- Fry the meat for a few minutes, season and add the tomato paste and ground spices except cinnamon. Mix well, add a little water or chicken stock to loosen the brown bits at the bottom of the pan, cover and cook on a low simmer for 20 minutes or till the meat is tender. Keep stirring the mixture every few minutes, adding stock/water as needed to prevent it from burning.
- Once the meat is cooked, check the seasoning, add black pepper and ground cinnamon, mix well, switch off the flame and allow the mixture to cool down. The filling should not be dry. It must have a little, but not too much, thickish sauce lightly coating the sauce.
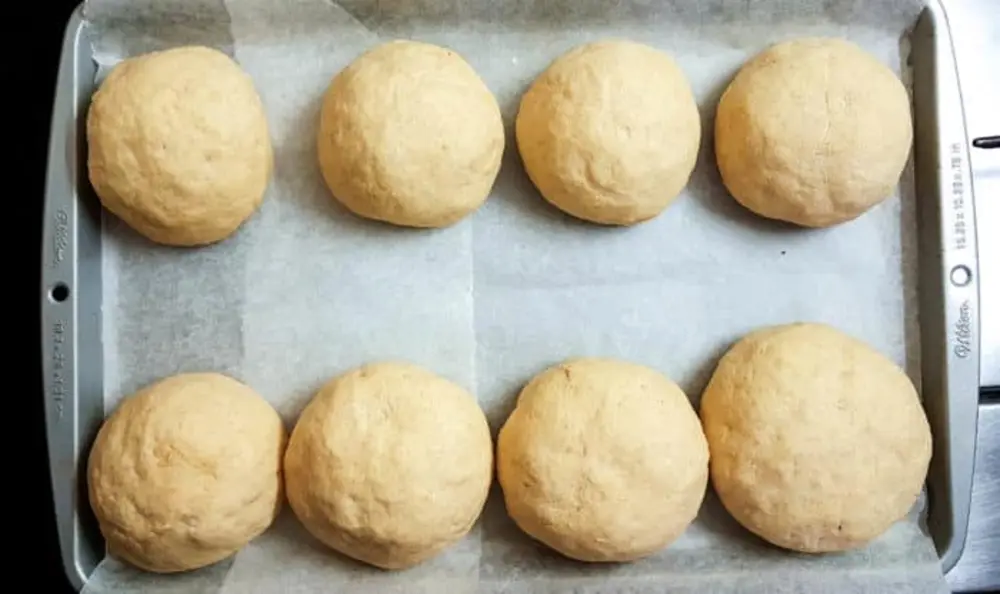
- When the dough has doubled, tip it onto a lightly floured surface, punch it down gently to release the air and reshape into a log. Be light-handed with the dough. Weigh the dough and then using a pastry cutter, portion into 8 equal pieces.
- Roll out each portion of dough, place 2 tbsp of filling in the centre and shape into tight balls, tucking the seam and the sides in. Place them on a baking tray, that has been lined with baking parchment. Cover with a lightly greased cling wrap and let aside to proof for a further 30-45 minutes.
- While the buns are proofing, preheat the oven to 190℃. Beat the egg with a little water in a bowl and using a pastry brush, lightly brush each bun with the egg wash and dust with a sprinkling of sesame seeds.
- Place the buns in the oven and bake for 20-25 mins until the tops are golden and shiny and the bottom sounds hollow when tapped. Remove immediately form the oven and cool on a wire rack, covered with a tea towel. Store in an airtight container for a day or two. Store in a ziplock bag in the fridge for upto a week.